I’ve learned that the best Thanksgiving projects combine practical function with skill development. There’s something satisfying about creating pieces your family will use year after year, and Thanksgiving offers the perfect opportunity to build projects that bring everyone together around the table.
Today I’m sharing five woodworking projects that range from simple beginner builds to more complex constructions. Each project teaches specific woodworking techniques while creating beautiful, functional pieces for your Thanksgiving celebration. Whether you’re just starting with power tools or looking to expand your skills, you’ll find a project that matches your comfort level.
What I appreciate most about these projects is how they build on each other. Start with simple place card holders to get comfortable with your miter saw, then progress through serving trays and centerpiece boxes, each one introducing new techniques. By the time you reach the advanced projects, you’ll have developed real woodworking skills that extend far beyond holiday decorating.
Project Lineup Overview
Here’s what we’ll be building, organized from simplest to most complex:
- Simple Wooden Place Card Holders (Beginner) – Learn basic miter saw operation and straight cuts
- Farmhouse Serving Tray (Easy-Intermediate) – Practice edge-gluing boards and installing hardware
- Rustic Centerpiece Box (Intermediate) – Master corner joints and box construction
- Modern Serving Tray with Handles (Intermediate-Advanced) – Execute precise 45-degree miters and hardware installation
- Complete Table Setting System (Advanced) – Create matching pieces with consistent finishing
Each project introduces new skills while remaining practical and achievable. You’re not just making decorations – you’re building a foundation of woodworking knowledge that will serve you for years to come.
Project 1: Simple Wooden Place Card Holders (Beginner)
Estimated Time: 1-2 hours | Skill Level: Beginner | Cost: $5-15
Project Overview
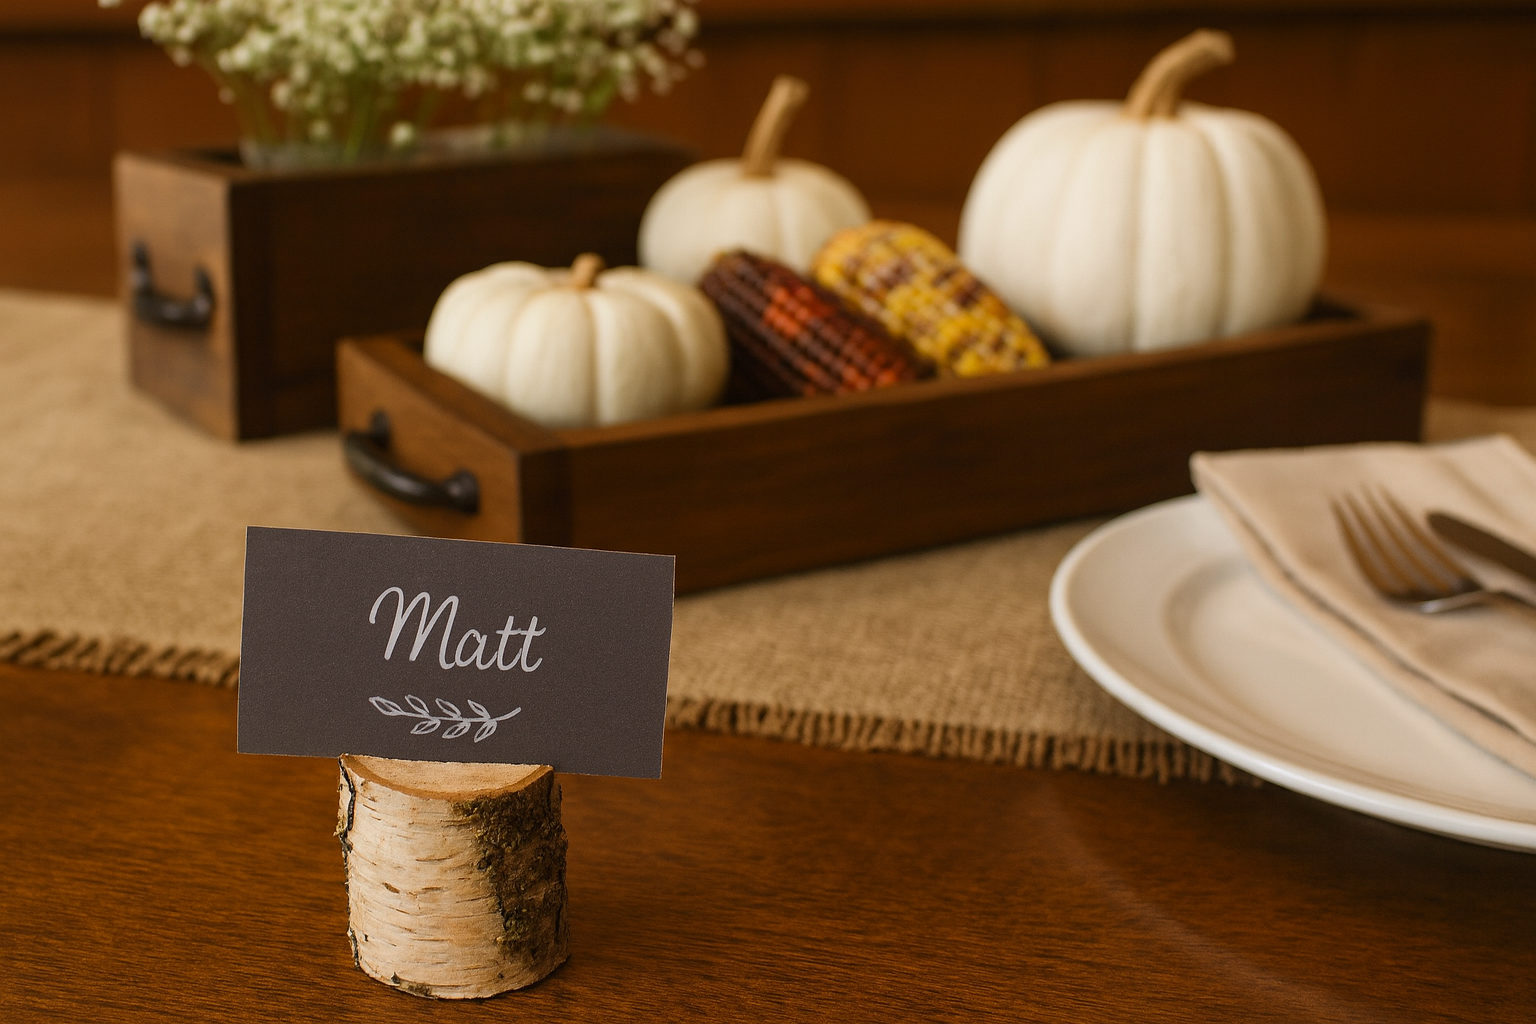
These natural wood place card holders add a personal touch to your Thanksgiving table while teaching fundamental saw operation. The beauty of this project lies in its simplicity – you’re making functional cuts on small pieces of wood, which is the foundation of all woodworking. Plus, the rustic aesthetic means imperfections actually add character rather than detracting from the final product.
I made a set of these with my 11-year-old daughter, and it was the perfect introduction to safe power tool use. The pieces are small enough that mistakes aren’t costly, but the techniques you’ll learn apply to every future project.
Key Tutorials
For this project, I recommend these excellent step-by-step guides:
- DIY Wood Place Card Holders from Tree Branches – Uses natural fallen branches from your yard, resulting in beautiful rustic holders with moss and lichen
- Easy DIY Place Card Holders from Paint Sticks – Creates six holders for under $1 using paint stir sticks from the hardware store
Both tutorials provide clear photos and instructions perfect for beginners.
What You’ll Learn
This simple project teaches several fundamental skills:
- Safe miter saw operation – How to position small pieces and make controlled cuts without putting your fingers at risk
- Creating functional slots – Cutting narrow slits that hold cards securely without splitting the wood
- Working with small pieces – Using clamps or miter box pegs to secure wood while cutting, a skill you’ll use constantly
- Basic finishing techniques – Applying stain or leaving wood natural to enhance grain patterns
These are the building blocks for every project that follows.
Important Gotchas
Watch for Uneven Cuts – If your holders don’t sit flat on the table, they’ll tip over. Make sure your cuts are perfectly perpendicular to the length of the wood. Use the fence on your miter saw or miter box to ensure consistent 90-degree cuts.
Don’t Make Slots Too Deep – A 1/4″ to 1/2″ slot is sufficient for holding place cards. Go deeper and you risk splitting the wood, especially near the ends of your pieces. Test your slot depth with an actual place card before cutting all your holders.
Secure Small Pieces Properly – Never hold small wood pieces with your hand near the blade. Use the built-in pegs on a miter box, or clamp pieces securely before cutting. Your fingers are worth more than any project.
Plan for Extras – These small pieces are easy to split or mess up. Cut at least 20% more than you need – the extras take minimal time and material, but save you from running back to the workshop mid-project.
Essential Tools & Equipment
Required Tools:
- Miter saw or Miter box
- Safety glasses
- Clamps or miter box with built-in pegs
- Hand saw (if using miter box)
Optional but Helpful:
- Sanding block or 120-grit sandpaper
- Wood stain in walnut or natural tones
- Foam brushes for applying stain
Project Materials
From Your Yard:
- Fallen tree branches (1.5-2″ diameter, relatively straight sections)
Or Purchase at Hardware Store:
- Paint stir sticks (3-pack for $1.12, makes 6 holders)
- 1×4 pine boards cut to 4″ sections
Finishing Supplies:
- Minwax wood stain in Provincial or Special Walnut
- Paper towels or lint-free rags for wiping stain
- Place cards (standard 3.5″ x 2″ size)
Most of your materials for this project will come from your yard or cost under $5 at any hardware store. It’s the perfect introduction to woodworking without significant investment.
Project 2: Farmhouse Serving Tray (Easy-Intermediate)
Estimated Time: 3-4 hours | Skill Level: Easy-Intermediate | Cost: $15-30
Project Overview
A wooden serving tray is one of those pieces you’ll use constantly – not just at Thanksgiving, but year-round for breakfast in bed, outdoor entertaining, or organizing items on the coffee table. This project introduces edge-gluing boards to create wider panels, a technique that opens up countless future projects.
My wife uses the tray I built three years ago almost weekly. It’s held up beautifully and the rustic finish hides the inevitable dings and scratches from regular use. That durability makes it perfect for a beginner project – you’re building real furniture, not delicate decorations.
Key Tutorials
These tutorials offer different approaches, so choose based on your tool access:
- Easy DIY Wood Serving Tray – Sawdust Sisters – Uses four 1×4 boards glued together with jute rope handles, can be built in 20 minutes
- DIY Wooden Serving Tray – Our Home Made Easy – Single wide board design with added side pieces, great for beginners
Both approaches create beautiful, functional trays perfect for Thanksgiving entertaining.
What You’ll Learn
This project builds directly on your place card holder experience:
- Edge-gluing boards – Creating wider panels by gluing multiple boards side-by-side, essential for countless projects
- Installing end pieces – Attaching perpendicular pieces with glue and nails for strong joints
- Adding hardware – Drilling pilot holes and installing handles without splitting wood
- Creating square corners – Using a speed square to ensure your tray is properly rectangular
You’re also getting comfortable with power tools if you use a brad nailer, which significantly speeds up assembly on future projects.
Important Gotchas
Use Enough Glue, But Not Too Much – Too little glue creates weak joints. Too much squeezes out everywhere and makes a mess. Run a consistent bead down the edge of the board, about 1/8″ wide. When you clamp the boards together, you should see a tiny bit of squeeze-out along the entire seam – that’s perfect.
Don’t Rush the Clamping – When gluing boards edge-to-edge, they want to slide around. Take your time aligning the boards perfectly flush before tightening clamps. Once the glue sets even slightly, adjustments become impossible. I use small pieces of scrap wood as cauls across the top to keep everything flat.
Pre-Drill for End Piece Nails – If you nail through the end pieces without pre-drilling, you’ll split the wood about 50% of the time. Use a drill bit slightly smaller than your nails, and drill at least 3/4″ deep into the base of the tray. This takes an extra five minutes but saves you from rebuilding end pieces.
Center Your Handles Carefully – Nothing looks worse than asymmetric handles. Measure from both ends to the center point, mark it clearly, then measure the handle spacing from that center mark. Double-check before drilling – once those holes are in, they’re permanent. My first tray had handles that were off by 1/4″, and I still notice it every time I use it.
Essential Tools & Equipment
Required Tools:
- Miter saw for cutting boards to length
- Drill/driver for pilot holes and handle installation
- Bar clamps (at least 2, ideally 4) for gluing
- Brad nailer OR hammer and finish nails
- Safety glasses and hearing protection
Measuring and Layout:
- Tape measure
- Speed square for checking corners
- Pencil for marking
Project Materials
Wood (Purchase at Hardware Store):
- Four 1×4 boards at 18″ length (for tray base)
- Two 1×4 boards at 13-3/4″ length (for end pieces)
Or use a single 1×10 or 1×12 board if you prefer the simpler design
Assembly Supplies:
- Titebond wood glue
- 1-1/4″ finish nails or brad nails
- 120-grit and 220-grit sandpaper
Hardware and Finishing:
- Rope handles or decorative drawer pulls
- Wood stain OR paint in your chosen color
- Polyurethane or food-safe finish
- Foam brushes and rags
This project requires slightly more investment in tools, particularly clamps, but these tools will be used in virtually every woodworking project you tackle going forward.
Project 3: Rustic Centerpiece Box (Intermediate)
Estimated Time: 4-6 hours | Skill Level: Intermediate | Cost: $20-40
Project Overview
A wooden centerpiece box becomes the focal point of your Thanksgiving table and serves you through every season. Fill it with fall leaves and pumpkins for Thanksgiving, evergreen boughs for Christmas, or fresh flowers for spring dinners. This project teaches proper box construction, a fundamental skill that applies to storage boxes, planters, and countless other builds.
I’ve built three of these boxes over the years as gifts, and people still send me photos of how they’ve decorated them for different holidays. That versatility makes this project worth the extra time investment.
Key Tutorials
These guides offer different construction methods based on your tool access:
- Simple DIY Wooden Box for Table Centerpiece – Woodshop Diaries – Can be made from a single 1×6 board, includes optional modern risers for a contemporary look
- DIY Wood Box Centerpiece – Love Grows Wild – Uses Kreg jig for invisible joints and includes distressed paint finishing
- Easiest DIY Wood Box Centerpiece – Do Dodson Designs – Great option for using scrap wood, focuses on simple brad-nail assembly
Each tutorial shows a slightly different approach, so choose based on whether you want hidden joints (Kreg jig method) or don’t mind visible nail heads (brad nail method).
What You’ll Learn
This project takes your skills to the next level:
- Box construction fundamentals – How to create strong corner joints that hold together under stress
- Wood grain orientation – Why grain direction matters and how to orient boards for maximum strength
- Pocket hole joinery OR brad nail assembly – Two different methods for joining boards at right angles
- Creating distressed finishes – Combining stain, paint, and chalk paint for aged, rustic looks
You’re also learning to work with longer boards and make multiple identical pieces – crucial skills for larger projects.
Important Gotchas
Pay Attention to Grain Direction – The wood grain on your side pieces should run vertically (parallel to the height of the box), not horizontally. This prevents the sides from wanting to cup or bow over time. When you cut your pieces, think about how the grain will run in the finished box.
Dry-Fit Before Gluing – Always assemble your box completely without glue first. This reveals if any pieces are slightly wrong lengths or if corners don’t meet properly. Making adjustments after glue is applied ranges from difficult to impossible. I’ve wasted entire afternoons trying to fix boxes that weren’t dry-fitted properly.
Pocket Holes Go on the Inside – If you’re using a Kreg jig, drill pocket holes on the inside faces of your boards where they won’t be visible. This seems obvious, but it’s easy to get confused about which face is which when you’re drilling. Mark the inside face with painter’s tape before drilling.
Keep Boxes Low for Table Centerpieces – Resist the urge to make your box too tall. Anything over 5-6″ high blocks sight lines across the table and makes conversation awkward. I made this mistake on my first centerpiece and had to rebuild it shorter – learn from my error.
Essential Tools & Equipment
Required Tools:
- Miter saw for cutting pieces to length
- Drill/driver for assembly
- Brad nailer OR Kreg jig for joinery
- Bar clamps for glue-up
- Sander or sanding blocks
Layout Tools:
- Tape measure and pencil
- Speed square
- Combination square for marking
If you’re planning to do more woodworking beyond Thanksgiving projects, this is a good time to think about which tool ecosystem makes sense for you. The brad nailer and drill you’re using likely run on rechargeable batteries, and choosing compatible tools can save you hundreds of dollars long-term. I wrote a complete guide on choosing a battery platform that explains the pros and cons of each major brand’s system.
Project Materials
Wood:
- One 1x6x8 board can make the entire basic box
- OR: Use 1×4 or 1×6 boards cut to your preferred dimensions
- Typical finished dimensions: 24-30″ long, 5-7″ wide, 4-6″ tall
Assembly:
- Wood glue
- 1-1/4″ brad nails OR 1-1/4″ pocket hole screws
- Assorted sandpaper (120, 150, 220 grit)
Finishing:
- Wood stain in your chosen color
- Chalk paint or acrylic paint for distressed look
- Polyurethane or wax finish
- Optional decorative drawer pulls or handles
- Foam brushes and lint-free rags
You can find suitable wood at any hardware store, though buying a longer 1×6 and cutting it down is usually more economical than buying pre-cut shorter pieces.
Project 4: Modern Serving Tray with Handles (Intermediate-Advanced)
Estimated Time: 6-8 hours | Skill Level: Intermediate-Advanced | Cost: $30-60
Project Overview
This project elevates your tray-building skills to a professional level. The 45-degree mitered corners create clean, modern lines that look store-bought, and the recessed handle installation is a technique you’ll use on cabinet doors, drawers, and countless other projects. Working with hardwoods like walnut or oak also teaches you how different woods behave compared to the soft pine you’ve likely been using.
I built one of these trays in white oak as a wedding gift, and the couple still displays it prominently in their home three years later. The investment in better wood and precise construction creates an heirloom-quality piece.
Key Tutorials
These advanced tutorials assume you’re comfortable with previous projects:
- DIY Modern Serving Tray with Handles – Woodshop Diaries – Features cut corners for a modern look, walnut construction, and excellent detail on handle installation
- How to Build a Walnut Serving Tray – This Old House – Uses box joint construction for a more traditional but extremely strong corner joint
The Woodshop Diaries tutorial is more approachable for someone stepping up from intermediate projects, while the This Old House version teaches proper box joints if you want to master that technique.
What You’ll Learn
This project introduces precision joinery:
- Perfect 45-degree miter cuts – How to set up your miter saw for accurate angle cuts and how to test cuts before committing
- Recessed hardware installation – Drilling precisely-sized holes for mounting hardware from hidden sides
- Working with hardwoods – Understanding how oak, walnut, and maple differ from pine in terms of cutting, sanding, and finishing
- Box joint construction (This Old House method) – Creating interlocking corner joints for maximum strength
You’re also learning that precision matters more as projects get more complex – a 1/16″ error that doesn’t matter on a rustic project becomes very visible on clean, modern designs.
Important Gotchas
Mitered Corners Require Perfect 45° Cuts – Even a degree or two off and your corners will have visible gaps. Test your miter saw’s angle setting by cutting scrap pieces and checking the joint before cutting your good wood. Many miter saws have slight inaccuracies in their angle indicators – trust your test cuts, not the printed numbers.
Measure Hardware Hole Depth Precisely – The holes for mounting handles must be exactly deep enough for the screw to protrude through but not so deep that screws bottom out without tightening. I use painter’s tape on my drill bit as a depth stop, positioning it so I can drill to exactly 1″ depth (or whatever your screws require). Drill one test hole in scrap first.
Glue Squeeze-Out Shows on Finished Wood – When you’re working with beautiful hardwoods and a clear finish, any glue that squeezes out of joints becomes very visible when stained. Wipe excess glue immediately with a damp cloth, and do a final check with a bright light before the glue sets. Dried glue won’t accept stain and creates light spots.
Hardwoods Dull Blades Quickly – Oak and walnut are much harder than pine and will dull saw blades noticeably faster. Use a fresh blade for this project, feed wood through saws more slowly, and watch for burn marks that indicate a dull blade. Trying to force cuts through hardwood with a dull blade is both dangerous and likely to ruin your workpiece.
Essential Tools & Equipment
Required Tools:
- Miter saw with accurate angle settings
- Table saw for ripping boards (or have hardware store rip them)
- Drill/driver with various bit sizes
- Brad nailer with 1-1/4″ nails
- Multiple bar clamps for glue-up
- Orbital sander for finishing
Precision Measuring:
- Combination square
- Digital calipers for hardware measurements
- Tape measure
Safety Equipment:
- Safety glasses
- Hearing protection
- Dust mask for sanding hardwoods
Project Materials
Wood:
- 3/4″ plywood for tray bottom (12″ x 18″ or your chosen size)
- 1×2 or 1×3 hardwood strips for sides (walnut, oak, or maple)
- Approximately 6 linear feet of 1x material needed
Hardware:
- Modern brass handles or pulls
- Screws appropriate for your chosen handles
Assembly and Finishing:
- Wood glue suitable for hardwoods
- Brad nails
- Sandpaper assortment (120 through 320 grit)
- Walrus Oil Furniture Butter OR Waterlox finish
- Lint-free rags for finishing
Hardwoods cost significantly more than pine – expect to spend $20-30 just on wood for this project. However, the finished result justifies the investment.
Project 5: Complete Thanksgiving Table Setting System (Advanced)
Estimated Time: 12-16 hours (multiple weekends) | Skill Level: Advanced | Cost: $75-150
Project Overview
This advanced project combines everything you’ve learned to create a matching set of table pieces: a centerpiece box, complementary serving tray, and a dozen place card holders, all with consistent finish and design. The challenge isn’t in the individual pieces – you’ve already built all of them – but in creating cohesive design, maintaining consistent finishing across multiple pieces, and efficiently batch-processing similar cuts.
This is the project where you transition from following tutorials to being a woodworker who can design and execute your own ideas. I’ve built two complete sets as Christmas gifts, and the planning and execution process taught me more about woodworking than any single project could.
Key Tutorial Resources
Rather than following a single tutorial, you’ll combine techniques from previous projects:
- Use the centerpiece box design from Project 3
- Apply the serving tray construction from Project 2 or 4
- Create place card holders from Project 1
- DIY Wooden Box Centerpiece Tutorial – Anika’s DIY Life – Excellent for understanding how to plan a complete build
The key difference is creating everything as a coordinated set rather than individual projects.
What You’ll Learn
This project is about integration and planning:
- Design cohesion – How to choose dimensions, proportions, and details that create a matching set
- Batch processing – Cutting all similar pieces at once for efficiency and consistency
- Consistent finishing – Ensuring stain color matches across different projects and wood pieces
- Project management – Planning work sequence to minimize tool setups and maximize efficiency
You’re essentially running a small woodworking production line, which teaches skills that apply whether you’re making gifts or building furniture for your home.
Important Gotchas
Buy All Wood at the Same Time – Wood color and grain patterns vary significantly even within the same species. Boards from different batches can look noticeably different after staining. Purchase all your wood in a single trip, preferably from the same bundle if possible, to ensure visual consistency.
Test Stain on Scrap from Each Project – Even if you’re using the same wood species, grain patterns affect how stain absorbs. Cut small test pieces from each board and apply your chosen stain before finishing the actual projects. What looks perfect on pine might look completely different on the oak you chose for the tray.
Make Extra Place Card Holders – Small pieces are easy to mess up, and having exactly the number you need creates stress. Make 15-18 holders for a table that seats 12. The extras take minimal additional time and materials, but eliminate panic if you split a piece or make an error.
Finish All Pieces Simultaneously – Stain and finish change slightly as they age in the can and react differently in various temperatures and humidity. Do all your staining in a single session, and apply finish coats to all pieces on the same day. This ensures the most consistent color matching.
Label Pieces During Multi-Day Builds – When you’re building multiple boxes and trays over several weekends, similar pieces of wood look identical. Use painter’s tape to label sides, bottoms, and ends so you don’t accidentally mix up pieces between projects.
Essential Tools & Equipment
You’ll use every tool from previous projects, plus a few additions for efficiency:
All Previous Tools, Plus:
- Additional clamps (you’ll need many for batch glue-ups)
- Finishing spray station or large drop cloths
- Quality paintbrushes for finishing
- Shop vacuum for cleanup between projects
This is also where having cordless tools with interchangeable batteries becomes crucial. You’ll be switching between miter saw, drill/driver, sander, and nailer frequently. Having multiple battery packs means you’re never waiting for charges. If you haven’t already, read my guide on power tool battery platforms to understand how to build an efficient tool system.
Project Materials
For Complete Set (Centerpiece Box + Serving Tray + 12 Place Card Holders):
Wood:
- Two 1x6x8 boards for centerpiece box
- Four 1x4x8 boards for serving tray
- One 1x4x6 board for place card holders (or use paint stir sticks)
Hardware:
- Modern brass handles for both box and tray
- Wood screws and brad nails
- Wood glue
Finishing (For All Pieces):
- One quart wood stain in chosen color
- One quart polyurethane or furniture wax
- Sandpaper assortment (full range 80-320 grit)
- Multiple foam brushes and lint-free rags
- Painter’s tape for labeling
Optional Decorative Elements:
- Coordinating drawer pulls
- Stencils for adding designs
- Chalk paint for accents
Buying materials in larger quantities for a complete set is usually more economical than purchasing for individual projects.
Tool Progression Guide
Understanding which tools you need at each skill level helps you invest wisely without buying unnecessary equipment.
Must-Have Tools (Projects 1-2)
For the first two beginner projects, you can get by with a minimal tool set:
- Miter saw or miter box – Your primary cutting tool. A hand-powered miter box ($15-25) works fine for small projects, though a powered miter saw ($100-200 for budget models) makes work much faster
- Drill/driver – Essential for pilot holes and installing hardware. A basic cordless model ($50-80) handles everything you need
- Basic hand tools – Hammer, screwdrivers, tape measure, square
- Clamps – At least two bar clamps for gluing boards
- Safety equipment – Safety glasses and hearing protection (if using power tools)
Total investment: $100-300 depending on whether you choose hand or power tools.
Intermediate Tools (Projects 3-4)
As you progress to intermediate projects, these tools become very helpful:
- Brad nailer – Dramatically speeds up assembly compared to hand-nailing and reduces fatigue. Pneumatic models ($30-50) require an air compressor, while cordless models ($100-180) offer more convenience
- Orbital sander – Makes finishing much faster and produces better results than hand sanding. Budget models start around $30-50
- Kreg jig – If you choose pocket hole joinery, a basic jig costs $30-40 and opens up many building techniques
- More clamps – You’ll want 4-6 bar clamps for intermediate projects
- Table saw (optional) – Allows you to rip boards to custom widths. This is a significant investment ($200-500) but expands your capabilities enormously
Additional investment: $150-400 (or $400-900 if adding a table saw).
Advanced Tools (Project 5)
For advanced projects and efficient batch processing:
- Multiple battery packs – If using cordless tools, having 3-4 batteries means never waiting for charges
- Router (optional) – Adds decorative edges and specialized joints ($80-150)
- Biscuit joiner or domino joiner (optional) – Advanced joinery tools for serious furniture building ($100-400+)
- Thickness planer (optional) – Allows working with rough lumber for significant cost savings ($300-500 for benchtop models)
These tools represent the transition from hobbyist to serious woodworker. Don’t feel pressure to buy everything at once – add tools as projects demand them.
Tool System Compatibility
Here’s where thinking about battery platforms becomes critical. Once you own a cordless drill, miter saw, and brad nailer from one brand, you’re heavily invested in that battery system. Adding new tools from the same brand means just buying the bare tool (often 30-40% cheaper than with battery), while switching brands requires buying complete new battery systems.
I learned this the hard way after accumulating a mix of incompatible tools. When I finally standardized on Milwaukee M18, I sold my mismatched tools at a loss. Starting with a compatible system from the beginning would have saved me hundreds of dollars.
My detailed guide on choosing a power tool battery platform walks through exactly how to evaluate the major systems (DeWalt, Milwaukee, Ryobi, Makita) based on your budget and project types. If you’re serious about woodworking, reading that before buying your second cordless tool can save you significant money and frustration.
Pro Tips for Thanksgiving Table Projects
After building dozens of Thanksgiving projects over the years, here are insights that will save you time and improve your results:
Material Selection
Pine vs. Hardwood – Pine stains unevenly, with darker absorption along the grain and lighter in between. This creates a “stripy” appearance that some find rustic and charming, others find amateur. If you want more even color, consider poplar (still affordable but stains more consistently) or splurge for oak or maple on visible pieces.
Grain Pattern Matters – Look for boards with consistent grain spacing. Wild grain variations create visual chaos, especially if you’re building multiple pieces. I sort through every board at the lumber yard, much to my kids’ annoyance, but it makes a huge difference in the finished project.
Avoid Boards with Knots Near Cuts – That pretty knot will look great in the middle of a board but creates problems near edges. Knots are harder than surrounding wood and dull blades faster. They also tend to crack and fall out near edges. Save boards with prominent knots for the centers of trays or box bottoms.
Time-Saving Techniques
Batch Your Cuts – Set up your miter saw once and cut all pieces of the same length before moving to the next size. This eliminates repeated measuring and saw adjustments. For the complete table setting project, I cut all place card holder pieces, then all centerpiece box pieces, then all serving tray pieces in sequence.
Sand Before Assembly – It’s infinitely easier to sand flat boards than assembled boxes or trays. Get sanding completely done before gluing anything together. This seems to add time up-front but saves at least twice that time compared to trying to sand inside corners and tight spaces.
Create Finishing Stations – Set up separate areas for staining and for final finishing. Stain in the garage where drips don’t matter, then move to a cleaner indoor space for final polyurethane coats. This prevents dust contamination in your topcoat, the number one cause of rough, orange-peel finishes.
Quality Improvement Tips
Grain Direction Is Not Optional – I mentioned this in the centerpiece box section, but it bears repeating: wood grain should run the long dimension of any piece. Ignoring this means your projects will warp and cup over time. Check grain direction before every single cut.
Test Joints Before Gluing – This seems obvious but I still sometimes skip it in my rush to finish. Every single time I skip the dry-fit, I regret it. Glue makes errors permanent. Dry-fitting reveals problems while they’re still fixable.
Apply Finish in Thin Coats – Whether you’re using stain or polyurethane, thin coats dry faster, create fewer drips, and build to a smoother final finish than thick coats. Plan on 3-4 thin coats rather than 1-2 heavy coats. Yes, it takes more time, but the results are incomparably better.
Sand Between Finish Coats – After your first coat of polyurethane dries, lightly sand with 320-grit sandpaper before applying the second coat. This removes dust nibs and creates mechanical adhesion for the next coat. The final finish will be glass-smooth instead of rough and bumpy.
Timing Your Thanksgiving Projects
Strategic timing ensures you’re not rushing to finish projects the day before Thanksgiving dinner.
Planning Timeline
6 Weeks Before Thanksgiving – Decide which projects you’ll tackle and purchase all wood and materials. This gives you time to return damaged boards or buy additional supplies if needed. Wood purchases made close to Thanksgiving often face picked-over inventory.
4-5 Weeks Before – Complete all cutting and assembly. This is when you’ll spend weekends in the workshop building your pieces. Get everything constructed and dry-fitted, but don’t worry about finishing yet.
3 Weeks Before – Sand all pieces thoroughly and apply stain. Staining requires multiple days for drying between coats and can’t be rushed. Do all your staining at once for consistent color.
2 Weeks Before – Apply final protective finish (polyurethane or wax). This also requires multiple coats with drying time between. Better to finish early and have pieces sitting ready than to be applying final coats the night before dinner.
1 Week Before – Projects are complete. Use this week for decorating your pieces with seasonal items, making any last-minute adjustments, and addressing other Thanksgiving preparation.
Project Sequence
If you’re building multiple projects, tackle them in this order:
- Start with place card holders – These small pieces help you practice cuts and finishing without major time investment. They’re also quick wins that build confidence.
- Build the serving tray next – Medium complexity and time investment. By now you’re comfortable with your tools and ready for slightly longer boards and more complex assembly.
- Centerpiece box third – This is your skill test. If you can successfully build a box with square corners, you’re ready for more ambitious furniture projects in the future.
- Save the advanced tray for last – The mitered corners and precision requirements benefit from all your previous practice. Your skills are sharpest after completing earlier projects.
Weather Considerations
Temperature Affects Finishing – Stain and polyurethane don’t work well below 50°F or above 90°F. In most of the country, early November is perfect for finishing. If you live somewhere with extreme temperatures, plan finishing for a moderate weather window or work in a temperature-controlled space.
Humidity Slows Drying – In humid climates or during rainy periods, finishes take noticeably longer to dry. Add extra days between coats if you’re working in high humidity. I learned this the hard way when pieces I thought were dry stuck to each other when stacked.
Outdoor vs. Indoor Work – Cutting and assembly can happen in cold weather (I work in my unheated garage through winter), but finishing needs warmth. Plan your schedule accordingly based on your workspace.
Conclusion
These five projects create a progression from simple saw operation to complex multi-piece construction. More importantly, they teach you fundamental woodworking skills you’ll use for decades of future projects.
Start where you’re comfortable. If you’ve never used a miter saw, begin with the place card holders – they’re forgiving and teach essential techniques. If you’ve built a few simple projects already, jump straight to the serving tray or centerpiece box to expand your skills.
The beauty of Thanksgiving woodworking projects is that they’re functional and beautiful. You’re not just practicing techniques on throwaway projects – you’re building pieces your family will use year after year. The serving tray I built three years ago sits on our kitchen counter daily. The centerpiece box transitions through seasons filled with different decorations. Those place card holders come out for every special dinner.
That’s what makes these projects worth the time investment. You’re not just building for Thanksgiving 2025 – you’re building pieces that become part of your family traditions for years to come.
What project will you start with? Share your builds and questions in the comments below – I’d love to see what you create!
About the Author
As a father of four and technology professional, I approach DIY projects with the systematic thinking of an engineer and the practical concerns of a busy parent. I’ve built dozens of woodworking projects over the past decade, making every mistake so you don’t have to. My goal is to help other parents and homeowners develop real skills through achievable projects that make their homes more beautiful and functional.
Affiliate Disclosure: As an Amazon Associate, I earn from qualifying purchases. When you purchase through the links in this post, I earn a small commission at no additional cost to you. This helps support my ability to provide helpful content for DIY enthusiasts. I only recommend tools and materials I believe in and would use in my own workshop.
Leave a Reply