
Affiliate Disclosure: As an Amazon Associate, I earn from qualifying purchases. When you purchase through the affiliate links in this post, I earn a small commission at no additional cost to you. This helps support my ability to provide helpful content about tools and equipment. I only recommend products I believe offer genuine value and would use in my own home and workshop.
From simple weekend builds to impressive statement pieces – here’s how to create stunning fall decorations that welcome guests in style
Fall is the perfect time to give your front porch a seasonal makeover, and there’s no better way to do it than with custom wooden decorations that showcase your DIY skills. As a tech professional and father of four, I’ve learned that the best fall projects combine impressive visual impact with manageable time commitments that fit around busy family schedules.
Today I’m sharing five fall porch decoration projects that range from beginner-friendly afternoon builds to advanced weekend installations. Each project uses different power tool techniques, so you’ll build valuable skills while creating decorations that will impress neighbors and welcome trick-or-treaters in style.
Whether you’re just starting with power tools or looking for your next challenge, these projects offer the perfect progression from simple signs to complex installations. Let’s dive into each project, starting with the most accessible and working up to impressive statement pieces.
Project 1: DIY Fall Porch Sign (BEGINNER)
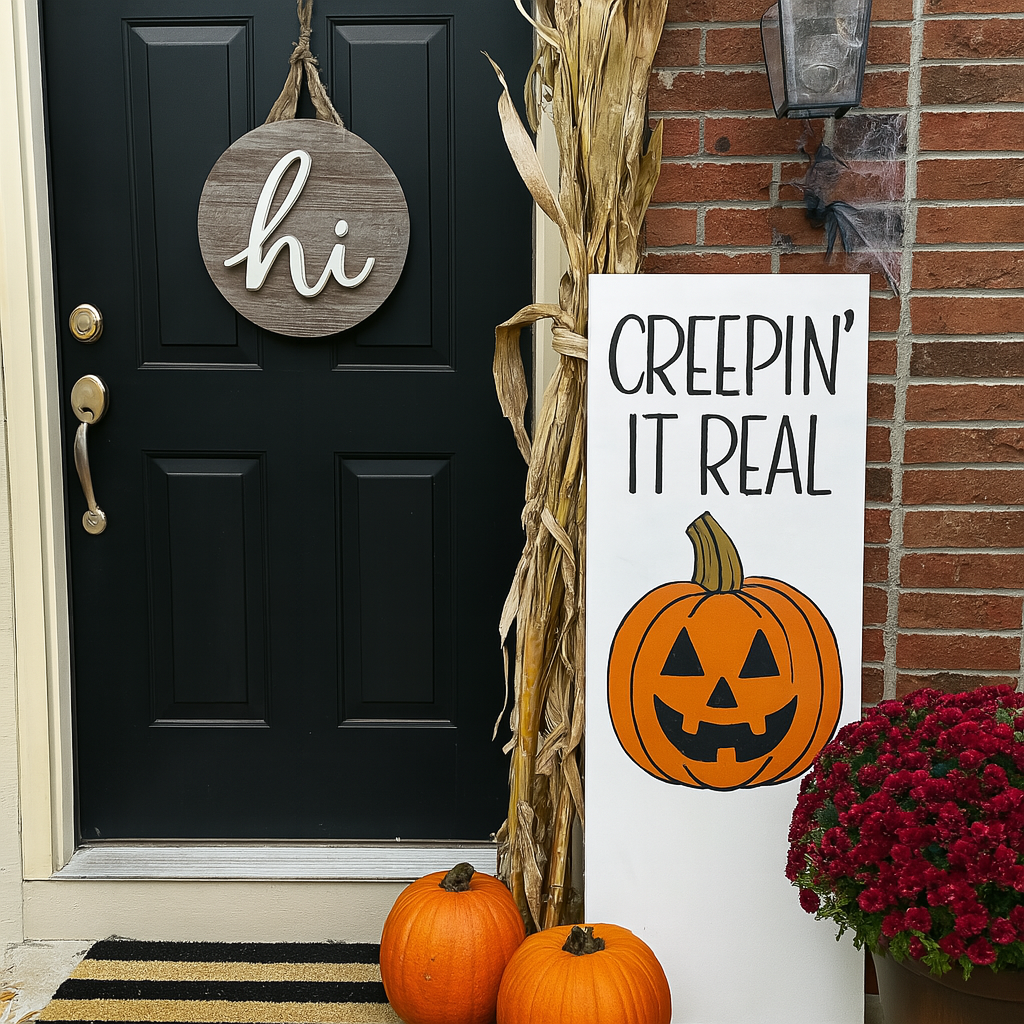
Estimated Time: 2-3 hours | Skill Level: Beginner | Cost: $15-25
Project Overview
Perfect for power tool beginners, this rustic fall sign uses basic cutting and painting techniques to create a welcoming seasonal greeting. The weathered wood look gives it authentic farmhouse charm that complements any porch style.
Key Tutorials:
What You’ll Learn
- Basic circular saw or miter saw operation
- Proper sanding technique for weathered effects
- Stenciling and hand-lettering methods
- Outdoor wood finishing
Important Gotchas
- Weather the wood before starting – New lumber looks too “fresh” for rustic signs
- Test your stencils first – Practice lettering on scrap wood to avoid mistakes
- Seal properly – Use outdoor-rated finishes or your sign won’t last the season
Essential Tools & Equipment
- Circular saw or miter saw
- Random orbital sander
- Drill/driver
- Clamps
- Safety equipment (glasses, hearing protection)
Materials & Supplies
- 1×6 or 1×8 cedar boards (choose pieces with character)
- Exterior wood stain (weathered gray, natural, or dark walnut)
- Outdoor polyurethane finish
- Sandpaper (120 and 220 grit)
- Wood screws
- Stencils or transfer paper
- Exterior paint (black or dark colors for lettering)
Project 2: DIY Wooden Lanterns (EASY-INTERMEDIATE)
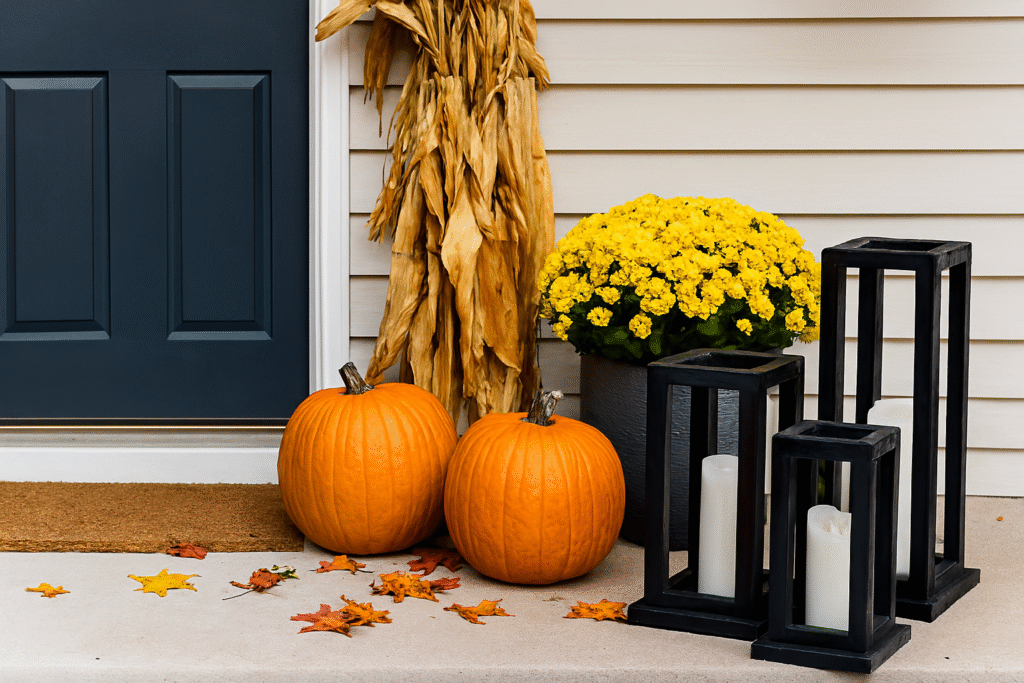
Estimated Time: 4-6 hours | Skill Level: Easy-Intermediate | Cost: $20-35
Project Overview
These classic fall lanterns showcase fundamental woodworking joinery while creating versatile decorations perfect for porches, mantels, or tablescapes. The project teaches precision measuring and introduces proper pocket hole techniques.
Key Tutorials:
What You’ll Learn
- Precision measuring and cutting
- Basic pocket hole joinery
- Router edge work (optional)
- Multi-piece assembly techniques
Important Gotchas
- Measure twice, cut once – Lantern proportions are critical for good looks
- Pre-drill everything – Thin dowels split easily without pilot holes
- Check square frequently – Crooked lanterns are obvious and unfixable
- Sand before assembly – Much easier than sanding finished pieces
Essential Tools & Equipment
- Miter saw with stop blocks
- Pocket hole jig (Kreg Jig recommended)
- Router (optional, for decorative edges)
- Nail gun (18-gauge finish nailer)
- Drill/driver with bits
Materials & Supplies
- 1×8 boards for top and bottom
- 3/4″ square dowels for posts
- Wood glue (exterior grade)
- 2″ finish nails
- Pocket hole screws
- Wood stain or paint
- Battery-operated LED candles
Project 3: Standing Fall Display Sign with Legs (INTERMEDIATE)

Estimated Time: 6-8 hours | Skill Level: Intermediate | Cost: $30-50
Project Overview
This freestanding sign combines frame construction with decorative panels, teaching advanced joinery while creating an impressive porch centerpiece. The support leg system makes it stable enough for windy fall weather.
Key Tutorials:
- Our Home Made Easy – DIY Wooden Fall Sign
- Lowe’s – Build a Wood Porch Railing (for advanced framing techniques)
What You’ll Learn
- Frame and panel construction
- Advanced pocket hole applications
- Angle cutting for support legs
- Professional finishing techniques
Important Gotchas
- Build the frame first – Panel dimensions depend on final frame measurements
- Check for wobble – Adjust leg angles until the sign stands perfectly stable
- Account for seasonal wood movement – Don’t make joints too tight
- Weight distribution matters – Top-heavy signs tip over in wind
Essential Tools & Equipment
Materials & Supplies
- 1×2 lumber for frame (8-10 pieces)
- 1/2″ plywood for panel
- Kreg screws (1¼” and 2½”)
- Chain and eye hooks for leg support
- Wood stain (weathered gray popular choice)
- Stencils for lettering
- Exterior wood finish
Project 4: DIY Multi-Level Fall Display Stand (INTERMEDIATE)
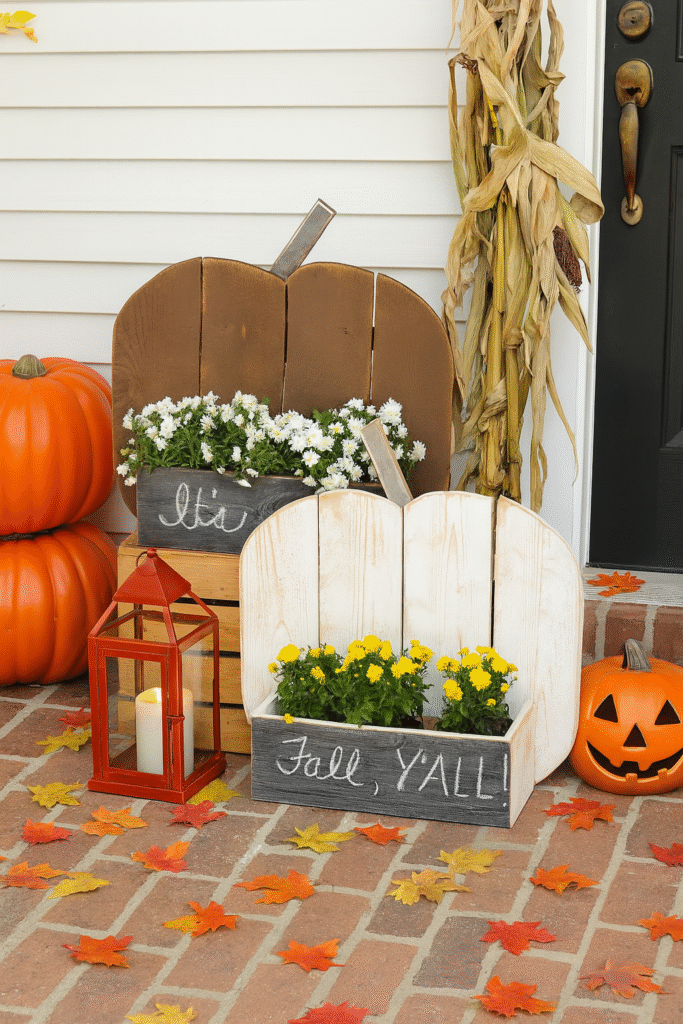
Estimated Time: 8-10 hours | Skill Level: Intermediate | Cost: $25-40
Project Overview
This tiered harvest display combines organic jigsaw work with precision construction to create the perfect showcase for mums, pumpkins, and seasonal gourds. The pumpkin-shaped back panel adds whimsical charm while multiple levels provide dynamic visual interest.
Key Tutorials:
What You’ll Learn
- Organic shape cutting with jigsaw
- Multi-level construction techniques
- Balancing visual proportions
- Creating stable tiered displays
Important Gotchas
- Draw the pumpkin shape carefully – It’s hard to “fix” a bad organic shape
- Use sharp jigsaw blades – Dull blades create rough cuts that are hard to sand smooth
- Test fit everything – Multiple components must align perfectly
- Make it stable – Top-heavy displays tip over easily; test with actual mums/pumpkins
Essential Tools & Equipment
- Jigsaw with fine-tooth blades
- Miter saw or circular saw
- Random orbital sander
- Drill/driver with bits
- Clamps (various sizes)
Materials & Supplies
- Cedar fence pickets or 1×6 boards
- 1×2 lumber for bracing and stems
- Exterior wood glue
- Wood screws (1¼” and 2″)
- Wood stain (orange, weathered gray, or natural)
- Sandpaper (120 and 220 grit)
- Exterior wood finish
Project 5: Professional Halloween Graveyard with Wooden Tombstones (COMPLEX)
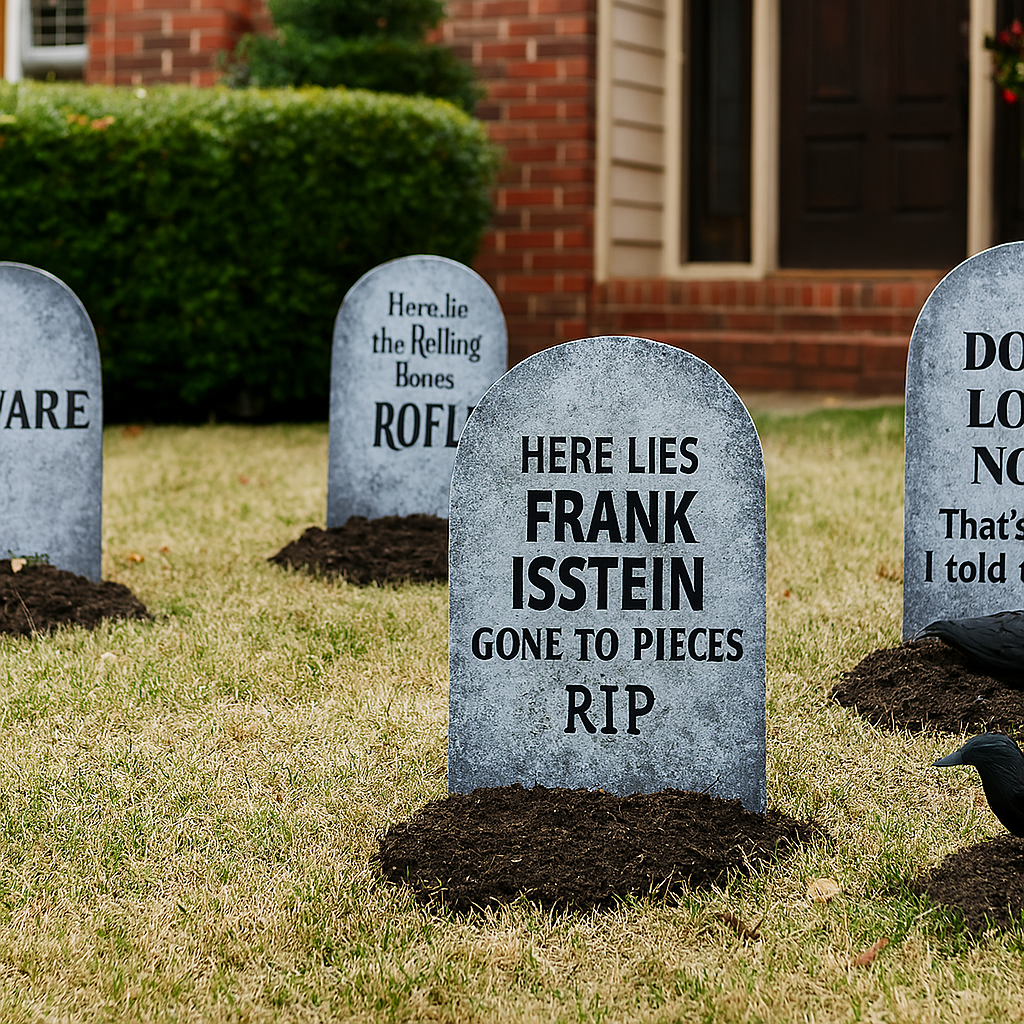
Estimated Time: 12-16 hours | Skill Level: Advanced | Cost: $40-80
Project Overview
Create an impressive Halloween display with multiple custom tombstones featuring unique epitaphs, weathered finishes, and professional installation. This project showcases advanced power tool techniques while creating neighborhood-stopping curb appeal.
Key Tutorials:
- Instructables – Making a Plywood Gravestone
- The Handyman’s Daughter – Super Easy DIY Halloween Tombstones
- Sawdust Girl – Awesome DIY Tombstones
What You’ll Learn
- Template creation and transfer techniques
- Complex curve cutting with jigsaw
- Multi-stage finishing and weathering effects
- Professional ground anchoring systems
- Custom engraving with rotary tools
Important Gotchas
- Make templates first – Cutting freehand leads to wonky tombstones
- Plan your graveyard layout – Sketch the full scene before cutting any wood
- Weather-resistant everything – Use exterior materials or tombstones won’t survive October
- Secure installation is critical – Improperly anchored tombstones become projectiles in wind
- Start early – This project takes multiple weekends; don’t wait until October
Essential Tools & Equipment
- Jigsaw with fine-tooth blades
- Miter saw or circular saw
- Router (for decorative edges)
- Dremel rotary tool (for engraving)
- Random orbital sander
- Paint sprayer or airbrush system
- Reciprocating saw (for rebar cutting)
- Angle grinder with cut-off wheel
Materials & Supplies
- 3/4″ exterior plywood sheets
- 2×10 or 2×12 lumber (for rustic versions)
- 16″ rebar stakes
- Metal conduit straps
- Exterior primer and multiple paint colors
- Stucco mix (for advanced texture effects)
- Transfer paper for designs
- Various brushes and painting supplies
- Weatherproofing sealers
Essential Power Tools for All Projects
Whether you’re tackling your first porch sign or building an entire Halloween graveyard, having the right tools makes all the difference. Here are the power tools I recommend, starting with must-haves and building up to advanced options:
Must-Have Tools (Projects 1-2)
- Cordless drill/driver – Essential for every project
- Circular saw or miter saw – For basic cutting tasks
- Random orbital sander – Professional finishing results
- Basic safety equipment – Never compromise on safety
Intermediate Tools (Projects 3-4)
- Pocket hole jig – Game-changer for strong, hidden joints
- Jigsaw – Essential for curved cuts and organic shapes
- Router – Adds professional edge details
- Finish nailer – Speed and precision for assembly
Advanced Tools (Project 5)
- Dremel rotary tool – Perfect for engraving and detail work
- Paint sprayer – Professional finishing for large projects
- Reciprocating saw – Heavy-duty cutting tasks
- Angle grinder – Metal cutting and surface prep
Pro Tips for Success
After building numerous fall decorations over the years, here are my top tips for getting professional results:
Start with quality lumber – Spend a few extra dollars on straight, clear boards. Warped or knotty lumber creates problems that cost more time than the money saved.
Invest in sharp blades – Dull blades create rough cuts, burn marks, and safety hazards. Replace jigsaw and circular saw blades more often than you think necessary.
Test finishes on scrap wood – Every batch of lumber takes stain differently. Test your entire finishing process on scraps before applying to your project.
Plan for weather – Fall weather is unpredictable. Choose exterior-rated materials and finishes, and have a backup plan for rainy work days.
Think in collections – Multiple smaller projects often have more impact than one large piece. Consider making 2-3 lanterns or several tombstones rather than just one.
Timing Your Projects
Fall decorating season starts earlier than you might think:
- Late August: Start planning and ordering materials
- Early September: Begin simpler projects (Signs and lanterns)
- Mid-September: Tackle intermediate builds (Display stands)
- Late September: Complete complex projects (Halloween graveyard)
- Early October: Installation and final touches
Starting early ensures your decorations are ready for the peak fall season and gives you time to fix any issues that arise.
Ready to Transform Your Fall Curb Appeal?
These five projects offer the perfect progression for building both your woodworking skills and impressive seasonal displays. Whether you’re starting with a simple porch sign or ready to tackle an entire Halloween graveyard, each project teaches valuable techniques while creating decorations that will welcome guests and delight trick-or-treaters.
The key to success is choosing projects that match your current skill level while challenging you to learn new techniques. Start with Project 1 or 2 to build confidence, then work your way up to more complex builds as your skills and tool collection grow.
Remember, the best fall decorations aren’t necessarily the most complex – they’re the ones that welcome family and friends with warmth and seasonal charm. Pick a project that excites you, gather your materials, and start building. Your front porch transformation awaits!
What’s your favorite fall decoration project? Share your builds and questions in the comments below, and don’t forget to tag us on social media with your finished projects!
Leave a Reply